Experience the harmonious blend of mental uplift and body relaxation with Cookies & Cream Seeds from Origin Seed Co, featuring sweet, fruity, and woody flavors.
- Genetics: Girl Scout Cookies x Starfighter x Ruderalis
- Flowering Time: 9-10 weeks
- Type: Seeds > Autoflower Seeds
Cookies & Cream Autoflower
Cookies & Cream is a balanced hybrid, a result of crossing Girl Scout Cookies, Starfighter, and Ruderalis. Known for its sweet, fruity, and woody flavors, this strain offers a perfect mix of mental stimulation and physical relaxation. Its autoflowering genetics make it an easy-to-grow option for cultivators seeking a fast-flowering and resilient strain.
Lineage
The lineage of Cookies & Cream Seeds combines (Girl Scout Cookies x Starfighter) with Ruderalis. The addition of Ruderalis brings the convenience of autoflowering traits, allowing for quick harvests without the need for specific light cycles, while preserving the unique flavors and effects from its parent strains.
Is Cookies & Cream Sativa or Indica?
Cookies & Cream Autoflower is a well-balanced hybrid, offering both Sativa and Indica effects. It delivers uplifting and creative energy while promoting gentle physical relaxation, making it suitable for a variety of activities throughout the day.
Effects of Cookies & Cream
This strain provides a mix of mental clarity and physical relaxation, ideal for both creative endeavors and unwinding at the end of the day. The uplifting effects make it great for social settings, while the calming body sensation keeps you grounded.
Germinating Cookies & Cream Autoflower Seeds
To germinate Cookies & Cream Autoflower seeds:
- Place the seeds between two moist paper towels.
- Cover with a second plate to create a dark, warm environment.
- Keep the temperature between 70-90ºF, ensuring the towels stay moist.
- Seeds should germinate within 24-120 hours.
Cookies & Cream Autoflower Flowering Time
Cookies & Cream Autoflower typically flowers in 9-10 weeks, producing dense, resin-rich buds that are bursting with flavor. Its quick flowering time and effect yields make it a popular choice for growers.
Cookies & Cream seeds can be grown indoors or outdoors with ease. Using a nutrient-rich medium like coco coir or peat can enhance terpene production and promote healthy growth. This strain is well-suited for growers of all experience levels, thanks to its fast growth cycle and minimal maintenance requirements.
What Does Cookies & Cream Smell Like?
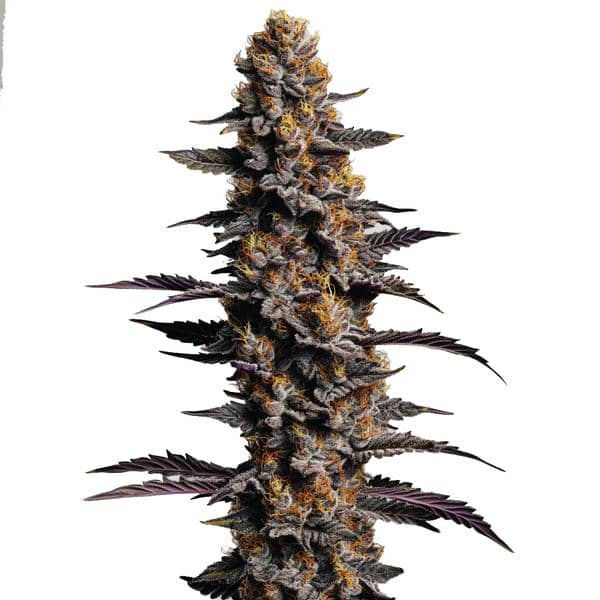
The buds of Cookies & Cream Autoflower have a sweet, fruity, and woody aroma, creating a smooth and flavorful smoking experience. This strain’s terpene-rich profile makes it especially enjoyable for those seeking complex flavors.
Experience Cookies & Cream
Cookies & Cream Autoflower delivers a balanced experience of mental stimulation and physical relaxation. Its hybrid nature makes it a great choice for both daytime and evening use, offering versatility for different activities.
Terpenes
The prominent terpenes in Cookies & Cream Autoflower include Beta-Caryophyllene, Alpha-Pinene, and Limonene. These contribute to its sweet, woody aroma and help create the calming and uplifting effects that define the strain.
Seed Germination Instructions
for cannabis seeds
Step 1: Soak the seeds
- Fill a glass with clean, room-temperature water (68-77°F / 20-25°C).
- Use filtered, dechlorinated, or pH-balanced water to prevent contaminants.
- Drop the seeds into the water and gently swirl to ensure full submersion.
- If seeds float, tap them down lightly or leave them to absorb water.
- Optional: Add 3% hydrogen peroxide (H₂O₂) at a ratio of 1 ml per 100 ml of water to prevent mold and bacteria.
- Place the glass in a dark, warm location for 2-6 hours (do not exceed 12 hours to prevent drowning).
Step 2: Prepare the Germination Plate
- Dampen two layers of paper towel, cotton, or thick toilet paper with clean, dechlorinated water.
- If using toilet paper, fold multiple plies to ensure adequate thickness.
- Place seeds evenly between the layers, ensuring they do not touch each other.
- Towels should be moist but not soaking wet.
- Set the damp towel on a plate and cover with another plate or place it inside a resealable plastic bag to retain moisture.
- Store in a dark, warm location (70-78°F / 21-26°C) such as a drawer or cabinet.
- Check the moisture level every 6-12 hours and add water as needed to prevent drying.
- Expected Germination Time:
- Most seeds crack open within 48-72 hours.
- Some may take 5-6 days to show taproots.
- Older seeds or seeds with a tougher shell may take up to 10-15 days to sprout.
- If a seed has not sprouted within 10 days, gently check it for signs of swelling or softening.
Step 3: Monitor Germination
- Seeds typically crack open and develop a taproot within 48-72 hours, but some may take up to 5-6 days.
- Older or dormant seeds may take 10-15 days to sprout, especially if they have a thicker shell.
- Check regularly for signs of mold or fungal growth.
- If mold appears, replace the paper towel and rinse seeds in a diluted hydrogen peroxide solution (1 ml of 3% H₂O₂ per 100 ml water).
- The seed is ready for planting when the white taproot emerges and reaches ¼-½ inch (0.6-1.3 cm).
Step 4: Planting the Seeds
- Prepare a pH-balanced growing medium (pH 5.5-6.0) such as:
- Quality soil-perlite mix
- Coco coir with perlite
- Rockwool cubes (must be pre-soaked in pH 5.5 water)
- Plant the seed 2-5 mm deep, with the root tip facing downward.
- Use containers that are at least 10 cm (4 inches) deep with drainage holes for healthy root development.
- Lightly cover the seed with soil—do not press down too hard.
- Spray the top layer with water instead of drenching it.
Step 5: Initial Care for Seedlings
- Keep the growing medium moist but not waterlogged—spray with a spray bottle instead of overwatering.
- Maintain high humidity by:
- Covering containers with clear plastic wrap or a humidity dome.
- Ensuring there is some airflow to prevent mold buildup.
- Place seedlings under cold white LED or fluorescent lights or in indirect sunlight at 68-77°F (20-25°C).
Step 6: Gradual Exposure to Light
- Once seedlings emerge and develop their first set of leaves (cotyledons):
- Slowly introduce them to stronger light sources.
- Start with low-intensity LED, CFL, or indirect sunlight, then gradually increase exposure.
- Keep grow lights at a safe distance:
- LEDs: 12-24 inches (30-60 cm) above seedlings.
- HPS/MH: 24-36 inches (60-90 cm) above seedlings.
- If transitioning to outdoor sunlight:
- Harden seedlings off gradually by placing them outside for short periods each day.
Additional Tips
- Use filtered rainwater, bottled water, or dechlorinated tap water.
- Maintain humidity levels between 70-80% for optimal germination.
- Avoid handling the taproot directly, as it is delicate and can be easily damaged.
- If using rockwool cubes, pre-soak them in pH 5.5 water before planting.
- Germination rates depend on strain genetics, seed age, and storage conditions.
Seeds may take longer to sprout if conditions are too dry, cold, or hot.
Failure to follow these steps may reduce germination success and replacements are unlikely.
By following these steps, you’ll achieve healthy, vigorous cannabis seedlings ready for strong growth. 🌱


