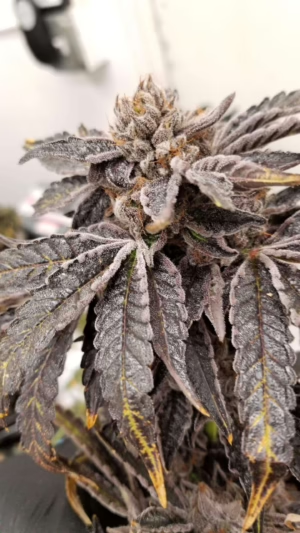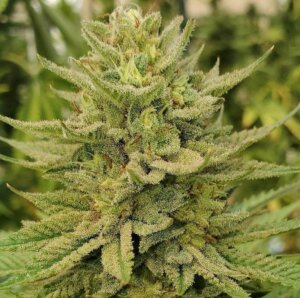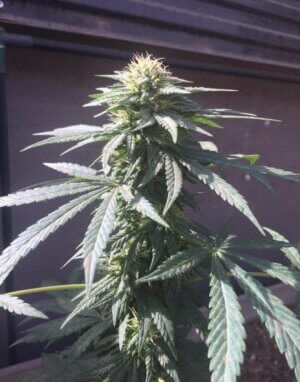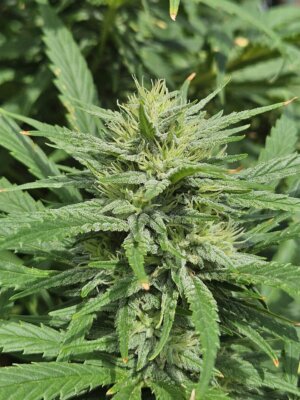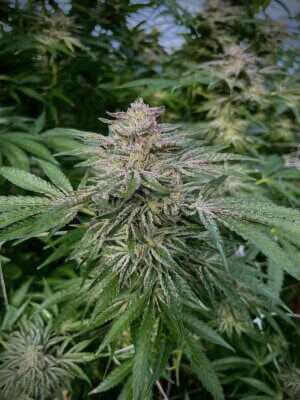

Discover the delightful fusion of flavors and aromas with MARSHMALLOW CHEESE Seeds, a tantalizing blend that promises a unique experience for connoisseurs and cultivators alike.
- Genetics: MARSHMALLOW OG X CHEESE
MARSHMALLOW CHEESE Seeds by Crockett Family Farms
Discover the exceptional blend of flavors and effects with MARSHMALLOW CHEESE Seeds from Crockett Family Farms. Renowned for their top-quality genetics and unique characteristics, these seeds are a must-have for cannabis connoisseurs and cultivators alike.
Genetics
The MARSHMALLOW CHEESE Seeds are the result of meticulous breeding, combining the creamy and sweet essence of Marshmallow with the robust and tangy notes of classic Cheese strains. Crockett Family Farms has ensured a stable and potent lineage, making these seeds a reliable choice for both novice and experienced growers looking to cultivate something truly special.
Effects
Experience the remarkable effects that MARSHMALLOW CHEESE has to offer. Known for its balanced high, this strain provides a soothing relaxation that can melt away stress and tension, while simultaneously offering a gentle cerebral uplift. It’s perfect for unwinding after a long day or enjoying a laid-back social gathering with friends.
Yield
Cultivators will be pleased with the generous yield that MARSHMALLOW CHEESE Seeds promise. Under optimal conditions, growers can expect bountiful harvests of dense, resin-coated buds. These seeds are designed to thrive in both indoor and outdoor environments, offering flexibility and impressive results.
Aroma
The aroma of MARSHMALLOW CHEESE is nothing short of delightful, characterized by its unique blend of creamy, sweet, and tangy scents that are sure to captivate the senses and enhance the overall experience.

Seed Germination Instructions
for cannabis seeds
Step 1: Soak the seeds
- Fill a glass with clean, room-temperature water (68-77°F / 20-25°C).
- Use filtered, dechlorinated, or pH-balanced water to prevent contaminants.
- Drop the seeds into the water and gently swirl to ensure full submersion.
- If seeds float, tap them down lightly or leave them to absorb water.
- Optional: Add 3% hydrogen peroxide (H₂O₂) at a ratio of 1 ml per 100 ml of water to prevent mold and bacteria.
- Place the glass in a dark, warm location for 2-6 hours (do not exceed 12 hours to prevent drowning).
Step 2: Prepare the Germination Plate
- Dampen two layers of paper towel, cotton, or thick toilet paper with clean, dechlorinated water.
- If using toilet paper, fold multiple plies to ensure adequate thickness.
- Place seeds evenly between the layers, ensuring they do not touch each other.
- Towels should be moist but not soaking wet.
- Set the damp towel on a plate and cover with another plate or place it inside a resealable plastic bag to retain moisture.
- Store in a dark, warm location (70-78°F / 21-26°C) such as a drawer or cabinet.
- Check the moisture level every 6-12 hours and add water as needed to prevent drying.
- Expected Germination Time:
- Most seeds crack open within 48-72 hours.
- Some may take 5-6 days to show taproots.
- Older seeds or seeds with a tougher shell may take up to 10-15 days to sprout.
- If a seed has not sprouted within 10 days, gently check it for signs of swelling or softening.
Step 3: Monitor Germination
- Seeds typically crack open and develop a taproot within 48-72 hours, but some may take up to 5-6 days.
- Older or dormant seeds may take 10-15 days to sprout, especially if they have a thicker shell.
- Check regularly for signs of mold or fungal growth.
- If mold appears, replace the paper towel and rinse seeds in a diluted hydrogen peroxide solution (1 ml of 3% H₂O₂ per 100 ml water).
- The seed is ready for planting when the white taproot emerges and reaches ¼-½ inch (0.6-1.3 cm).
Step 4: Planting the Seeds
- Prepare a pH-balanced growing medium (pH 5.5-6.0) such as:
- Quality soil-perlite mix
- Coco coir with perlite
- Rockwool cubes (must be pre-soaked in pH 5.5 water)
- Plant the seed 2-5 mm deep, with the root tip facing downward.
- Use containers that are at least 10 cm (4 inches) deep with drainage holes for healthy root development.
- Lightly cover the seed with soil—do not press down too hard.
- Spray the top layer with water instead of drenching it.
Step 5: Initial Care for Seedlings
- Keep the growing medium moist but not waterlogged—spray with a spray bottle instead of overwatering.
- Maintain high humidity by:
- Covering containers with clear plastic wrap or a humidity dome.
- Ensuring there is some airflow to prevent mold buildup.
- Place seedlings under cold white LED or fluorescent lights or in indirect sunlight at 68-77°F (20-25°C).
Step 6: Gradual Exposure to Light
- Once seedlings emerge and develop their first set of leaves (cotyledons):
- Slowly introduce them to stronger light sources.
- Start with low-intensity LED, CFL, or indirect sunlight, then gradually increase exposure.
- Keep grow lights at a safe distance:
- LEDs: 12-24 inches (30-60 cm) above seedlings.
- HPS/MH: 24-36 inches (60-90 cm) above seedlings.
- If transitioning to outdoor sunlight:
- Harden seedlings off gradually by placing them outside for short periods each day.
Additional Tips
- Use filtered rainwater, bottled water, or dechlorinated tap water.
- Maintain humidity levels between 70-80% for optimal germination.
- Avoid handling the taproot directly, as it is delicate and can be easily damaged.
- If using rockwool cubes, pre-soak them in pH 5.5 water before planting.
- Germination rates depend on strain genetics, seed age, and storage conditions.
Seeds may take longer to sprout if conditions are too dry, cold, or hot.
Failure to follow these steps may reduce germination success and replacements are unlikely.
By following these steps, you’ll achieve healthy, vigorous cannabis seedlings ready for strong growth. 🌱
What Our Customers Say
People Also Viewed:
(STRAWNANA CLEMENTINE) X CHEESE Seeds
Regular Seeds
Full Vial of Seeds (35-55 Seeds)
$50.00
Acai Tangie Seeds
Regular Seeds
Various Quantities
$125.00 – $200.00Price range: $125.00 through $200.00